To get started with XMLUI Portal follow those steps
Step #1
To connect to the XMLUI Portal you need to connect any Wi-Fi network first.
A DNS and Proxy settings need to be set to Auto mode.
- Connect to any Wi-Fi network as normal.
- Press next, get to Apple ID login and password request.
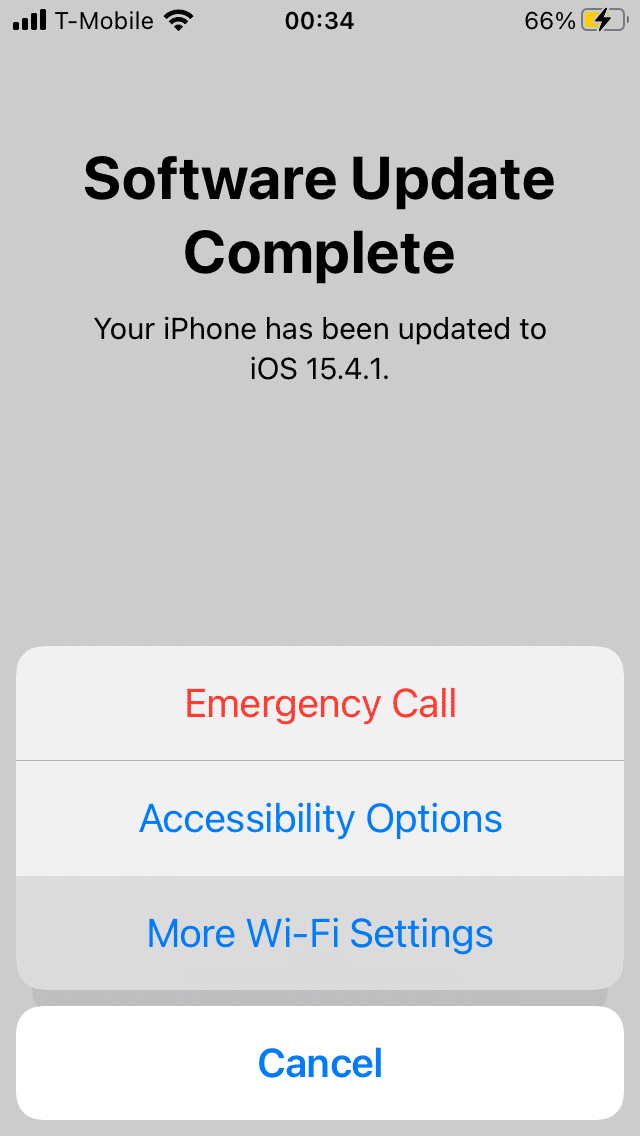
- Press and hold the Home/Power button to open other Wi-Fi settings dialog.
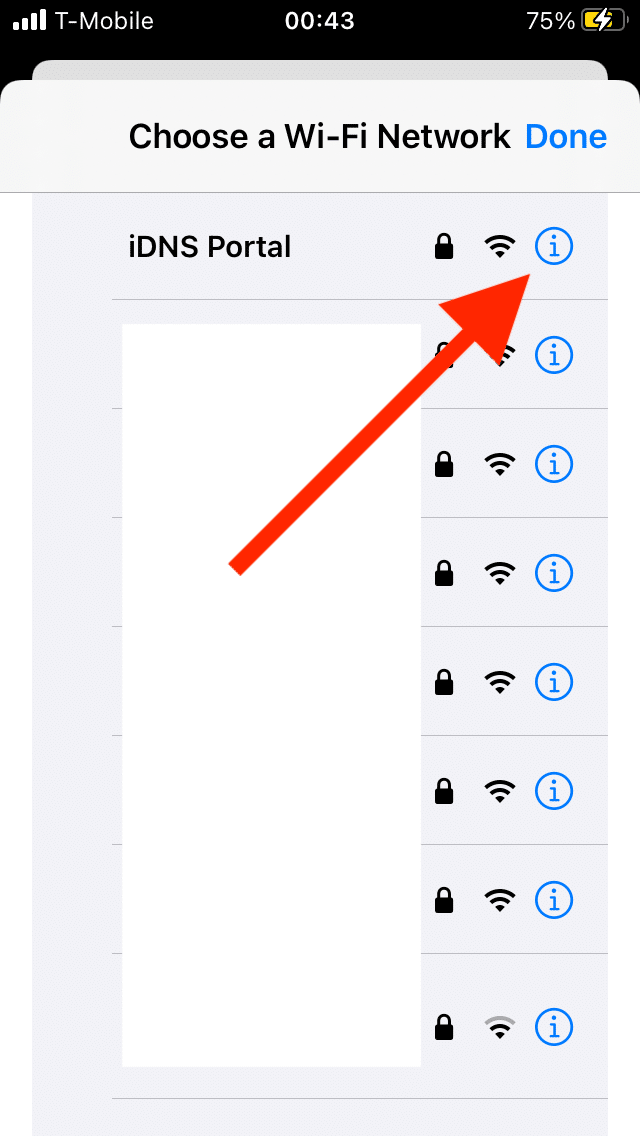
- Go to other Wi-Fi settings and press (i) icon on saved Wi-Fi name.
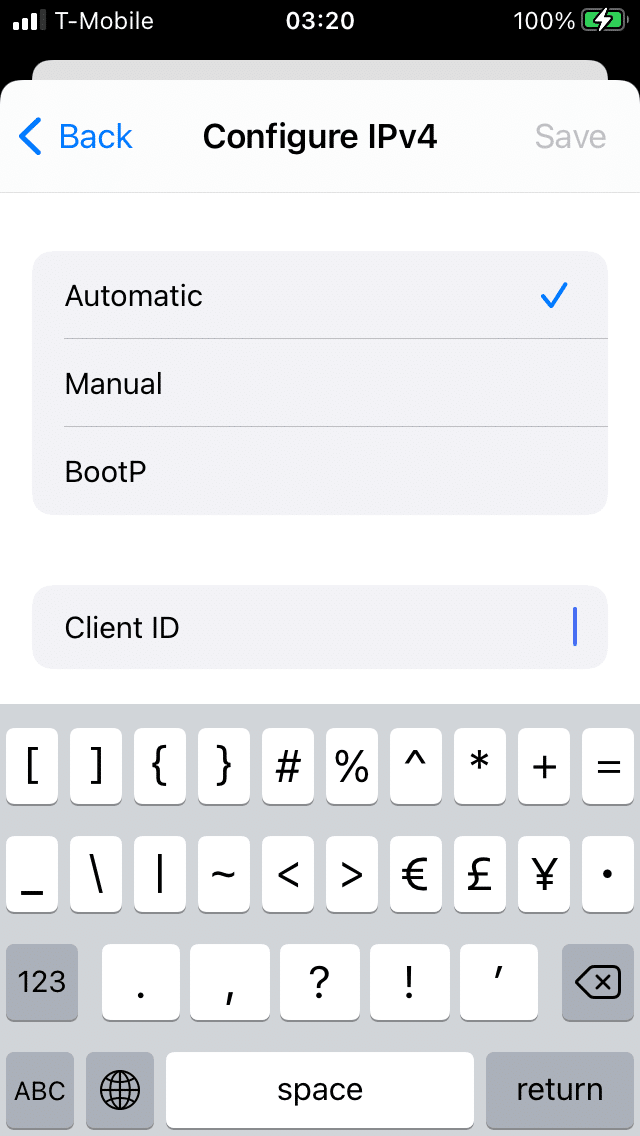
- Find Client ID field, it should be at IPv4 settings
- Enter one of the following lines to the Client ID field, try next one if previous failed
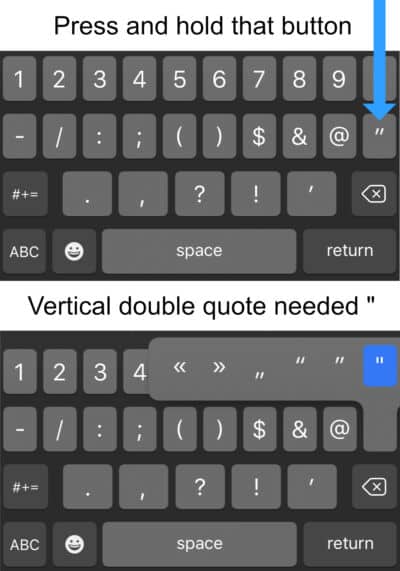
Enter the line below exactly as it is to the Client ID field
@"/>
Step #2
- Press and hold finger on typed text
- Press "Select All", then "Copy"
- Press "Save" at right top corner of screen
- Go back to Apple ID and password fields
- Press and hold on Apple ID empty field, then choose "Paste"
- Enter password, single char, SPACE
- Press "Next" on right top corner
- Another Apple ID and password request appears, enter your NickName to Apple ID field
- Press iDNSPortal button that is below password field
If you get an activation error, try alternative lines
@"/>
@"/>
If you need more information please watch the video
iOS, iPhone, iPad and iPod are trademarks of Apple Inc., registered in the U.S. and other countries.
Nintendo Switch is a trademark of Nintendo of America Inc., registered in the U.S. and other countries.
Android, Chromebook and Chrome OS are a trademark of Google LLC, registered in the U.S. and other countries.


